Malfunctions, commonly referred to (though somewhat nonspecifically) as jams, can occur in any sort of firearm action, regardless of configuration. This means that both rear-charging and side-charging AR15 uppers will be afflicted at times.
Knowing how to correct the malfunction, clear the rifle, and restore it to a firing state is paramount not just to firearm operability but to safety. This short post will break down some common malfunctions as well as what to do when (not if) they befall you.
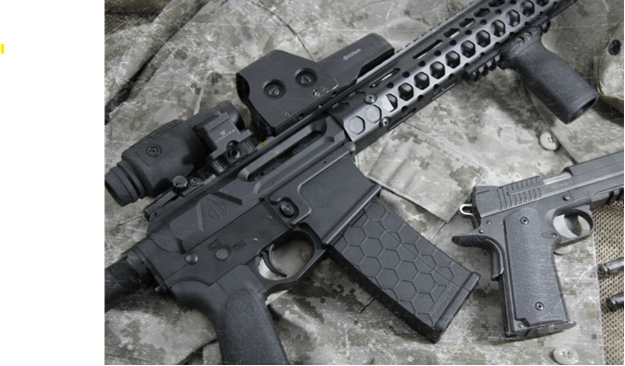
The Side-Charging Upper Advantage
One big thing to note here is that, while malfunctions can and will occur in both rear-charging and side-charging AR15 uppers, when a jam does affect a rear-charger, you must break your cheek weld in order to manually cycle the action.
This is not so for a side-charger. The side charging configuration not only allows you to keep your cheek firmly welded to the stock, but it also allows you to keep your firing hand on the grip in a ready position if you so choose. Alternatively, you could keep your support hand fixed on the forend and engage the charging handle with your firing hand – whichever is most comfortable for you.
Either way, the ergonomics of a side-charger are far superior when it comes to manual manipulation of the action.
Common Malfunctions and How to Clear Them
In many, but not all, situations, when you experience a malfunction you will hear the hammer fall and click but you will not hear the round go off.
In this general situation, your first instinct should be to “tap, rack, and reassess” also sometimes referred to as a “tap, rack, bang” drill.
Keeping the rifle pointed in a safe direction, remove your support hand from the forend and “tap” the magazine up into the magwell. This is the first portion of the drill and aims to ensure that the magazine is properly seated, engaged, and ready to feed.
Then, rack the bolt to the rear; this will open the action and should clear any spent shells or rounds from the chamber and action.
With the ejection port open and the action exposed, cant the rifle slightly so you can see into the action. That is, reassess, to see what is wrong with the rifle. If the action is clear, release the charging handle to close the action, then tap the charging handle to fully return it to battery, as a failsafe
At this point, you can resume firing – bang, hence the colloquial name for the drill
This protocol will help you assess and clear most common malfunctions with an AR-15 rifle, including failures to fire, failures to feed, and failures to extract and eject.
Another common malfunction is a double feed, which commonly occurs with a failure to extract as well as when two rounds pop up out of the mag simultaneously and the bolt attempts to force both into the chamber. In either case the malfunction will cripple the rifle until addressed and rectified.
In the case of a double feed caused by a failure to extract, in which you have a spent shell stuck in the chamber and a live round behind it on the feed ramp attempting to enter the chamber, here is the way to redress the situation.
“Tap, rack, reassess” won’t work in this scenario because if you tap the mag and rack the action, you’re just going to try to keep stripping and loading fresh rounds, until the mag is empty.
Rather, what you want to do is keep the rifle pointed in a safe direction and drop the mag. Then, either hold the charging handle fully to the rear or lock it back, and feed your fingers up into the magwell to dislodge any live round that is stuck in the action.
Once you’ve cleared any live rounds and are left with only the shell stuck in the chamber, release the charging handle to close the action, tap the charging handle to ensure that the action is fully closed and the extractor should engage the casing rim.
Then, rack the action back to extract the spent casing; this should fully clear the rifle.
Before replacing your magazine, inspect the feed lips to ensure that they are properly spaced and not damaged; deformed feed lips are a common cause of a double feed malfunction.
Otherwise, you can charge the rifle with the magazine and resume firing.
One more common type of malfunction is known as a stovepipe jam, so named because it results in a spent shell being trapped in between the bolt and upper itself, sticking out at an angle and resembling a stovepipe.
There are many things that can cause a stovepipe jam; these could include but are not limited to extractor and ejector malfunctions or an issue with the gas system. Either way, clearing one is simple enough. Follow the “tap, rack, reassess” protocol.
When you rack the charging handle back, the “stovepiped” shell should fall out of the action. Be diligent about reassessing, though, as the spent casing can fall back into the open action which will just end up causing another jam when you attempt to close the action.
Once you’ve cleared the spent shell from the action, you can close the action and resume firing. However, if stovepipes continue to occur, you will want to take a closer look at your extractor and ejector (specifically the latter) to ensure they are engaging and operating properly. Ejector malfunctions are a common cause of stovepipe jams.

For More Information on Our Side-Charging AR15 Uppers
These are a few of the common malfunctions that often affect side-charging AR15 uppers (though they are common on rear-chargers as well), along with a few ways to assess and address the potential issue.
For more information on our side-charging AR-15 uppers, or if you have any questions, please get in touch with us directly and we would be more than happy to help you out.